

Maven Resource Blog
How to Identify Roof Storm Damage: A Step-by-Step Guide
Learn how to identify roof storm damage after high winds or hail.
Book a free roof inspection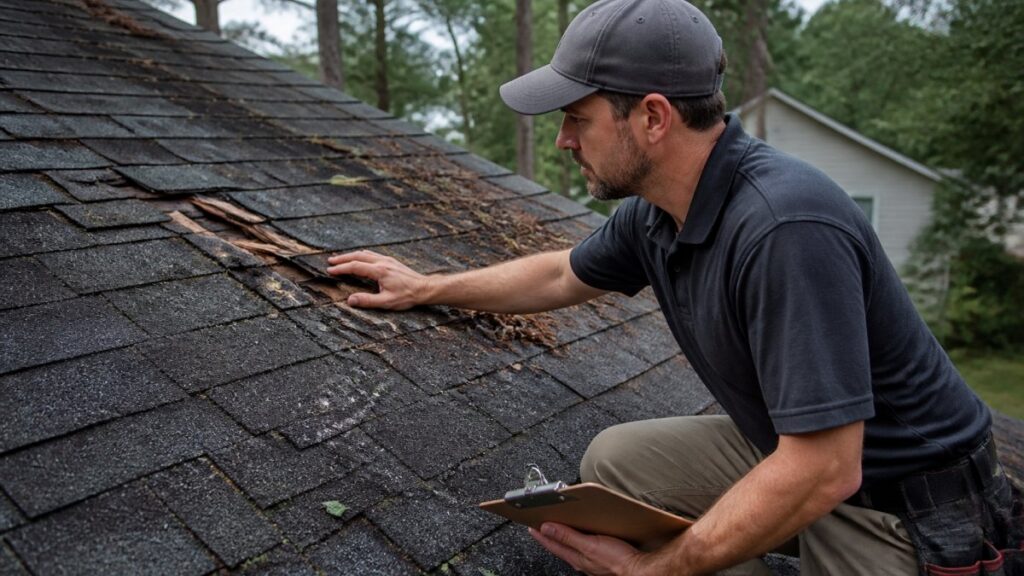
Table of Contents
- Why Storm Damage Inspection Matters
- How to Inspect a Roof After a Storm: Safety First
- Roof Hail Damage Signs and What They Mean
- Wind Damage: Missing, Lifted, and Curled Shingles
- Interior and Attic Inspection for Water Damage
- How to Document Roof Damage for Insurance
- What to Do After Storm Damage to Your Roof
- Storm Damage vs. Normal Wear: How to Tell the Difference
- Frequently Asked Questions
Last Updated: October 11, 2026
Why Storm Damage Inspection Matters
A severe storm can damage your roof in ways that aren’t always visible from the ground. Wind tears at shingles. Hail leaves dents and cracks. Rain finds its way into attics and walls.
This is where identifying roof storm damage early becomes critical. Identifying roof storm damage early becomes critical. The sooner you identify the damage, the sooner you can file an insurance claim and get repairs underway. Small issues become major problems when left untreated.
Storm damage inspection isn’t just about spotting obvious problems. It’s about understanding what to look for, where to look, and when to call a professional. This guide walks you through how to identify roof storm damage systematically, so you can protect your home investment and keep your insurance coverage intact.
How to Inspect a Roof After a Storm: Safety First
Inspecting your roof after a storm requires caution. Your safety matters more than any inspection. Before you climb a ladder or step onto your roof, understand the risks and know your limits.
When to Stay Off the Roof
Don’t climb onto your roof if any of these conditions exist:
- The roof surface is wet or icy
- Your roof pitch is steeper than 6/12 (a 6-inch rise for every 12 inches of horizontal run)
- You feel unsteady or uncomfortable at heights
- The roof structure shows visible sagging or damage
- There are loose shingles, debris, or moss covering the surface
- Weather conditions are windy or unstable
Wet surfaces are slippery. Steep pitches increase fall risk dramatically. If you’re unsure about your safety, stay on the ground. A professional inspection costs far less than a hospital visit or worse.
Ground-Level Inspection Checklist
The safest way to start is from the ground. You can see a surprising amount of roof damage without climbing.
Here’s what to check from ground level:
- Binoculars or zoom camera: Stand back from your house and use binoculars or your phone’s camera zoom to look at the roof surface. Look for missing, lifted, or curled shingles.
- Gutters and downspouts: Check for granules (small pebbles from shingles), debris, or dents. Clogged gutters trap water against the roof.
- Roof edges and flashing: Examine the metal strips where the roof meets walls, chimneys, and vents. Look for lifted, bent, or separated flashing.
- Visible leaks or stains: Walk around the outside of your house. Look for water stains on exterior walls, foundation cracks, or water damage near the foundation.
- Debris on the roof: Note branches, leaves, or other storm debris. This can trap moisture and accelerate damage.
- Roof line and structure: Step back and look at the overall roof shape. Does it sag in any areas? Is the line straight, or does it dip?

Use your phone’s camera zoom instead of climbing. Take photos from multiple angles around your house. You’ll have a record for your insurance claim and can review the images carefully later without rushing.
Roof Hail Damage Signs and What They Mean
Hail creates distinctive damage patterns on roofs. Understanding what hail damage looks like helps you identify it quickly and document it for your insurance claim.
Hail damage appears as dents, cracks, or bruises on roof shingles. The damage may not penetrate the shingle, but it compromises the protective layer underneath. Here’s what to look for:
- Dents and dimples: Small, round indentations on the shingle surface that look similar to golf ball dimples
- Cracked shingles: Visible splits or fractures in the shingle material
- Granule loss: Bare spots where the colored granules have been knocked off, exposing the asphalt underneath
- Soft spots: Areas that feel spongy or soft when pressed gently (only check if you’re on the roof safely)
- Bruised areas: Discolored patches where the shingle has been struck but not broken through
Hail damage doesn’t always mean immediate failure. However, damaged shingles age faster and fail sooner. They lose their ability to shed water effectively. Over time, water intrusion becomes likely.
The challenge with hail damage is distinguishing it from normal wear. New dents or damage will appear shiny or raw. Aged damage looks weathered and faded. Storm damage is typically clustered in one area, while normal wear spreads across the roof.
Don’t assume minor hail damage is harmless. Even small dents reduce shingle lifespan by years. Document all damage for your insurance company, as they determine whether repair or replacement is appropriate.
Wind Damage: Missing, Lifted, and Curled Shingles
Wind is one of the most common causes of roof damage. Understanding wind damage helps you spot problems early.
Missing shingles are the most obvious sign of wind damage. Entire shingles tear away, leaving bare roof sheathing exposed. Water intrusion happens quickly when shingles are missing.
Lifted shingles are partially torn away but still partially attached. The edge curls up, creating a gap where water can enter.
Curled shingles have edges that turn upward or downward. This happens when wind gets under the shingle edge and pulls it away from the roof deck.
Loose shingles are still attached but no longer sealed to the roof. The adhesive that holds them down has failed or been damaged.
Look for these signs on roof edges first. Wind damage typically appears on the side of your roof facing the storm.
Wind damage often appears in clusters. If you spot one damaged shingle, inspect the surrounding area carefully. Neighboring shingles likely have damage too.
Interior and Attic Inspection for Water Damage
Water damage inside your home may be the first sign that your roof has been compromised. Interior inspection is critical because exterior damage can exist for months before water finally finds its way in.
Start in your attic. Look for these signs:
- Water stains on roof sheathing: Brown or tan discoloration on the wood boards that form the roof deck
- Damp insulation: Wet or compressed insulation indicates active or recent water intrusion
- Mold or mildew: Black, green, or white growth on wood or insulation
- Daylight through the roof: Gaps or holes where you can see outside light
- Damaged rafters or joists: Soft, discolored, or rotted wood framing
Check your attic after storms, even if you don’t see exterior damage. Water can travel along rafters and roof sheathing before pooling in one location.
Inside your living spaces, look for:
- Ceiling stains: Yellow, brown, or gray discoloration on drywall or plaster
- Peeling paint or wallpaper: Water damage causes paint to bubble and peel
- Soft spots in drywall: Areas that feel spongy or weak when pressed
- Musty odors: Indicates mold growth, even if you can’t see it
- Water pooling in corners: Standing water after storms
Document all interior water damage with photos. This evidence strengthens your insurance claim and shows the extent of the problem.
How to Document Roof Damage for Insurance
Proper documentation is essential for your insurance claim. Insurance adjusters use your photos and notes to determine claim approval and payout amounts.
Here’s how to document roof damage effectively:
-
Take photos immediately after the storm: Don’t wait days or weeks. Fresh damage is easier to photograph and clearly shows storm-related cause.
-
Photograph from multiple angles: Take wide shots showing the overall roof, then close-ups of specific damage. Include photos from the ground and, if safe, from the roof.
-
Include reference objects in photos: Place a ruler, coin, or your hand next to damage for scale. This helps adjusters understand the severity.
-
Document the date and location: Note the date you took photos and which part of the roof they show (north side, east side, etc.).
-
Create a written inventory: List all damage you’ve identified, including location on the roof, type of damage, and estimated number of affected shingles.
-
Keep records of the weather event: Save weather reports, news articles, or emergency declarations related to the storm. This establishes that storm damage occurred in your area.
-
Don’t make repairs immediately: Insurance companies may want to inspect the damage before you repair it. Unauthorized repairs can affect your claim.
-
Get a professional inspection report: A licensed contractor can provide a detailed damage report that carries weight with insurance adjusters.
| Documentation Step | What to Include | Why It Matters |
|---|---|---|
| Photos | Wide and close-up views, multiple angles | Shows extent and location of damage |
| Reference objects | Ruler, coin, or hand for scale | Helps adjuster assess severity |
| Written notes | Location, damage type, affected area count | Creates official record of damage |
| Weather records | Storm reports, emergency declarations | Establishes storm occurred in your area |
| Professional report | Licensed contractor assessment | Adds credibility to your claim |
Email your documentation to yourself with a timestamp. This creates a digital record that’s harder to dispute. Back up photos to cloud storage so you don’t lose them if your phone is damaged.
What to Do After Storm Damage to Your Roof
After you’ve identified roof storm damage, follow these steps to protect your home and file your claim.
Step 1: Prevent further damage. If you have missing shingles or active leaks, temporary protection is important.
Step 2: Document the damage thoroughly. Use the documentation steps outlined above.
Step 3: Contact your insurance company promptly. Most policies require prompt notification of damage.
Step 4: Get a professional inspection. Contact a licensed roofing contractor for a detailed assessment. Many contractors offer free inspections.
Step 5: Obtain repair estimates. Get quotes from licensed contractors. Insurance companies often require multiple estimates.
Step 6: Cooperate with the insurance adjuster. The adjuster will inspect your roof and review your documentation.
Step 7: Review the insurance decision. Once the adjuster completes their inspection, you’ll receive a determination.
Timing matters. Many insurance policies limit the window for filing claims after a storm.
Storm Damage vs. Normal Wear: How to Tell the Difference
One of the hardest parts of roof inspection is distinguishing storm damage from normal aging.
Storm damage appears suddenly and clusters in specific areas. Hail damage concentrates where the hailstones fell.
Normal wear spreads across the entire roof. Aged shingles lose color uniformly. Granule loss happens gradually across all shingles.
Storm damage shows recent, raw surfaces. Torn edges look fresh. Exposed wood or asphalt appears new and unweathered.
Normal wear looks weathered and faded. Aged damage has rounded edges. Exposed areas are discolored and oxidized.
Storm damage is often concentrated. One section of roof shows heavy damage while nearby areas look fine.
Normal wear is distributed. Damage appears throughout the roof, not concentrated in one area. This pattern indicates gradual deterioration over time.
Insurance companies favor storm damage claims because they’re covered events. However, they scrutinize claims carefully to exclude normal wear.
Frequently Asked Questions
How can you tell if you have roof damage after a storm?
Look for missing or curled shingles, granule loss (dark spots or bare patches), dents in metal flashing, debris in gutters, and interior water stains on ceilings or walls. Check your attic for daylight coming through the roof, wet insulation, or mold growth. If you notice any of these signs, a professional inspection can confirm storm damage and help with insurance documentation.
What should you photograph when documenting roof storm damage?
Photograph missing or damaged shingles from multiple angles, granule loss patterns, dented flashing, gutter damage, and any debris on the roof. Take wide shots showing the overall roof condition and close-ups of specific damage. Document interior damage too: water stains, wet insulation, and mold. Include photos of the surrounding area showing storm aftermath. These images support insurance claims and help contractors assess repair needs.
Can hail damage a roof without leaving obvious signs?
Yes. Small hail can cause damage that isn’t immediately visible from the ground, such as cracked shingles, internal fractures, or granule loss that develops over time. Some damage only appears after weather exposure or as leaks develop. This is why professional inspections are valuable after significant hail storms, inspectors can identify damage you might miss and document it for insurance purposes.
When should you call a roofing professional after a storm?
Call a professional if you notice visible damage, water stains inside your home, or if a major storm passed over your area. Don’t wait for leaks to develop. A free professional inspection after a storm can identify damage early, prevent costly water intrusion, and provide documentation for insurance claims. Professional roofers are trained to spot damage that homeowners often miss.
Storm damage inspection protects your home and your insurance coverage. Early identification prevents small problems from becoming expensive repairs. Maven Roofing offers free roof inspections to help you assess storm damage and plan your next steps. Our team identifies damage you might miss and documents findings for your insurance claim. Book your free roof inspection online and get clarity on your roof’s condition.